
3d - Animation
3D - Animation
A 3D scene may contain only a single element as the subject of study against a black background (often for anatomy videos), or it can be rich in background elements to present the object in its environment (biology).
After that comes the animation stage, whether for camera movements within the scene or the animation of the objects themselves. Several animation techniques were used depending on the target effect, specifically particle systems, which I used on various occasions to animate synaptic vesicles, molecules, and red blood cells.
Rendering is the production stage during which the multimedia software produces the final images. Several rendering engines were used depending on the desired effect.
A 10-second sequence can require anywhere from 30 seconds to 3 days of rendering on a single machine, depending on the complexity of the scene. I used my two computers simultaneously to perform network rendering in order to save time.
Sometimes the construction of 3D models requires the use of complex techniques, such as the cross-sections of the brain and cerebellum, which were traced from MRI scans in Illustrator, 3DS MAX, and Photoshop. Several of these "ping-pong" techniques between different platforms were used during production.
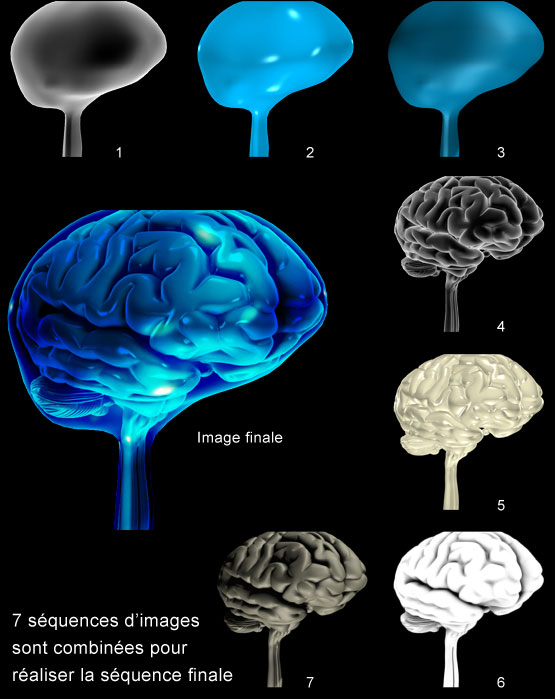
Most of the time, I render several versions of the same scene, each containing specific information. This allows me more control and flexibility during the post-production phase. The number of these versions can reach up to six: for color, object isolation, depth of field, shadows, glows, falloff, etc.
Sometimes, when I judge that a phenomenon will be better explained in 2D, I start production directly in After Effects. This is the case, for example, with the video on nerve impulses, which is mainly two-dimensional.
